Raspberry Pi - Raspberry Pi OS Quick Start
Overview
This section provides Eclipse Kura™ quick installation procedures for the Raspberry Pi and the Kura development environment.
Warning
This quickstart will install the version of Kura with the administrative web UI and network configuration support but not CAN bus support. For more information on this please visit the Eclipse Kura download page
This quickstart has been tested using the latest Raspberry Pi OS 32 and 64 bits images which are available for download through the official Raspberry Pi foundation site and the Raspberry Pi Imager.
Warning
Recent versions of Raspberry Pi OS 32 bit on Raspberry PI 4 will use by default a 64 bit kernel with a 32 bit userspace. This can cause issues to applications that use the result of uname -m to decide which native libraries to load (see https://github.com/raspberrypi/firmware/issues/1795). This currently affects for example the Kura SQLite database connector. It should be possible to solve by switching to the 32 bit kernel setting arm_64bit=0 in /boot/config.txt and restarting the device.
For additional details on OS compatibility refer to the Kura™ release notes.
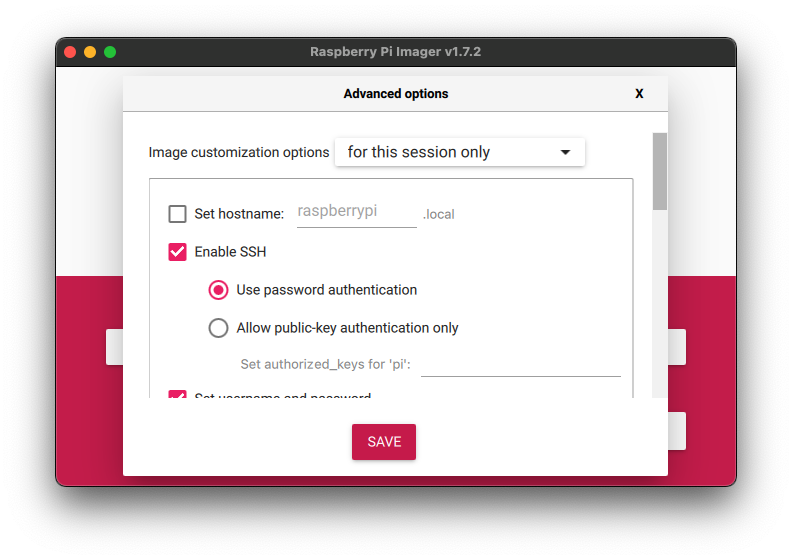
Enable SSH Access
The ssh server is disabled by default on Raspbian images released after November 2016, in order to enable it follow the instructions available here.
If you're using the Raspberry Pi Imager you can directly enable SSH before writing the operating system into the SD card by clicking on the "setting" icon.
Eclipse Kura™ Installation
To install Eclipse Kura with its dependencies on the Raspberry Pi, perform the following steps:
-
Boot the Raspberry Pi with the latest Raspbian image (starting from release 5.1.0 Kura is tested with Raspbian 11).
-
Make sure your device is connected to the internet. The best installation experience can be obtained when the device is cabled to the local network and the Internet. By default, the Raspberry Pi OS configures the ethernet interface
eth0in DHCP mode. -
Upgrade the system:
Tip
Optional: Since version 5.3.0 Kura also supports Eclipse Temurin™ as an alternative JVM. To install it you need to perform these additional steps:
-
Download the Kura package with:
Note: replace
<version>in the URL above with the version number of the latest release (e.g. 5.1.0). -
Install Kura with:
-
For a correct configuration of the Wlan interface, it is necessary to set the Locale and the WLAN Country through the
raspi-configcommand:
From the raspi-config main menu select
Localisation Options: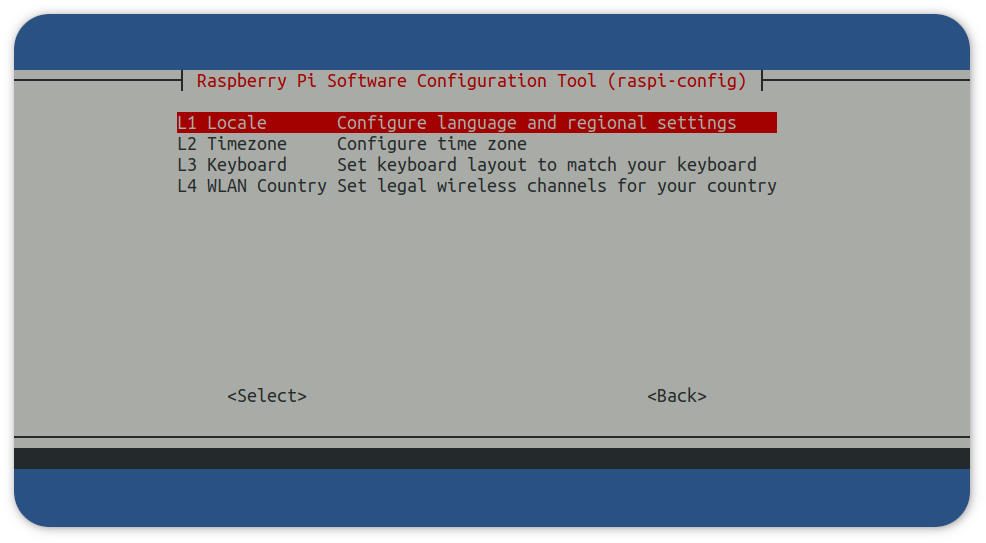
Then modify the Locale and WLAN Country with with the proper settings for your location. For example, an user located in Italy could set the values as the ones in the table:
Setting Value L1 Locale it_IT.UTF-8 UTF-8 L4 WLAN Country IT Italy -
Reboot the Raspberry Pi with:
Kura starts on the target platform after reboot.
-
Kura setups a local web ui that is available using a browser via:
The browser will prompt the user to accept the connection to an endpoint with an untrusted certificate:
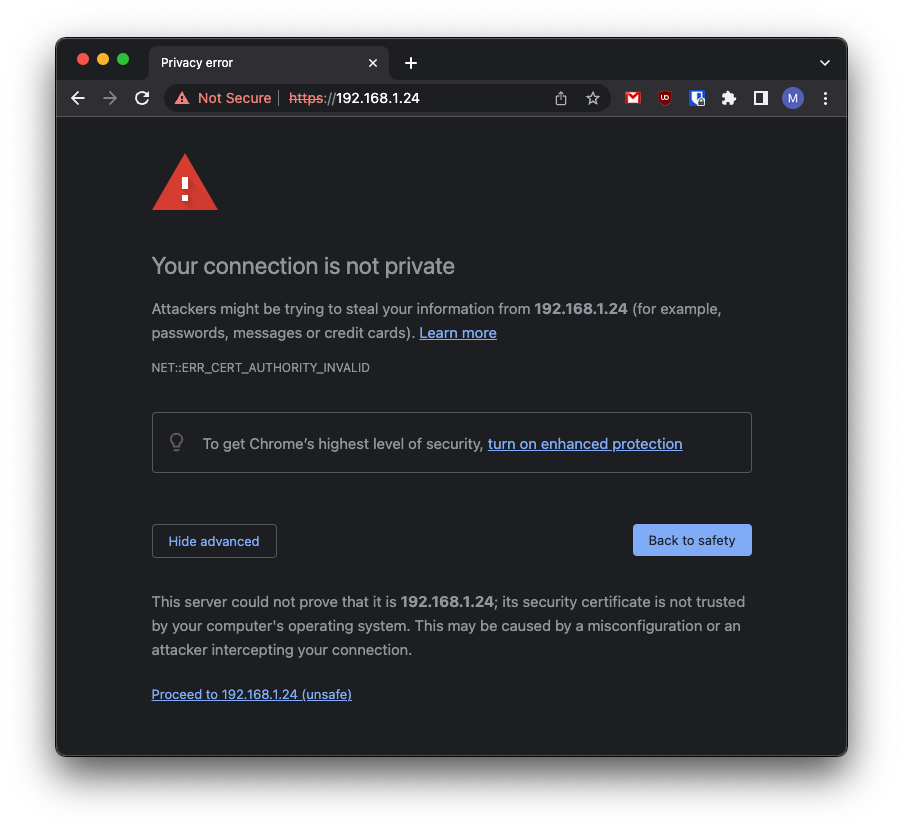
Once trusted the source, the user will be redirected to a login page where the default username is:
and the default password is: